Installing welleng on Windows
The welleng Python library is a growing collection of useful Python modules for Wells/Drilling Engineers. It started life as a core engine for automated well trajectory planning with a novel Mesh method for determining well bore collision risks and included the ISCWSA MWD error model for calculating well bore uncertainty ellipses for planned wells.
Although welleng is relatively straightforward to get up and running on a Linux OS, it has proven to be difficult to install on a Windows OS, which acts as a barrier to entry for a large number of engineers.
To address this, this post will step through how to get welleng up and running on a Windows 10 operating system. Be aware that an Administrator account is required, so if you’re attempting to install this on a locked down corporate machine you’ll likely need to request a developer account else have IT support you.
We’ll start with a clean Windows install using Amazon WorkSpaces.
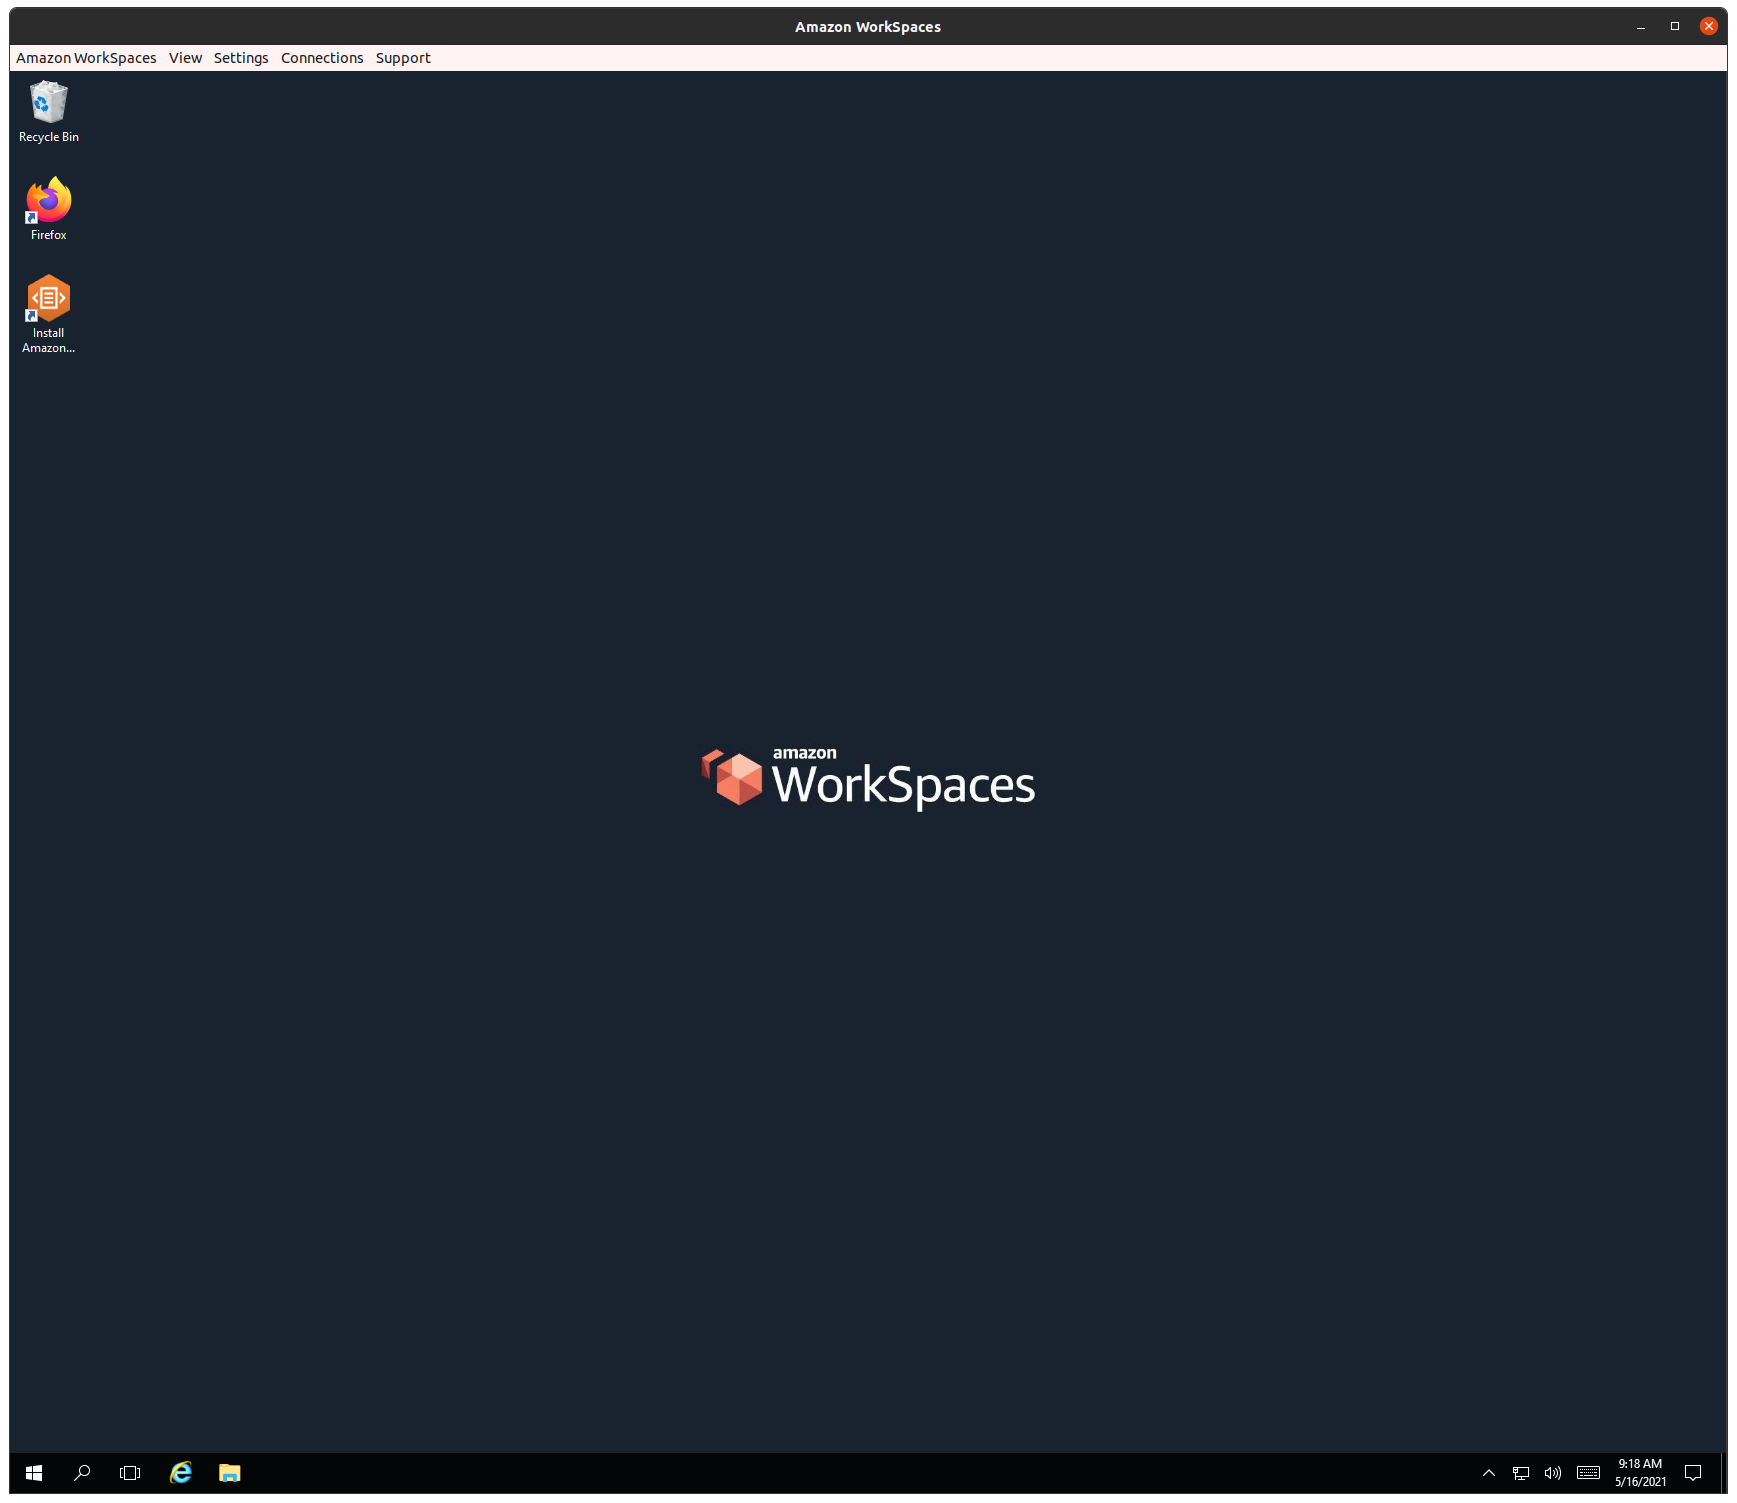
I love the smell of a fresh OS.
Install Visual Studio
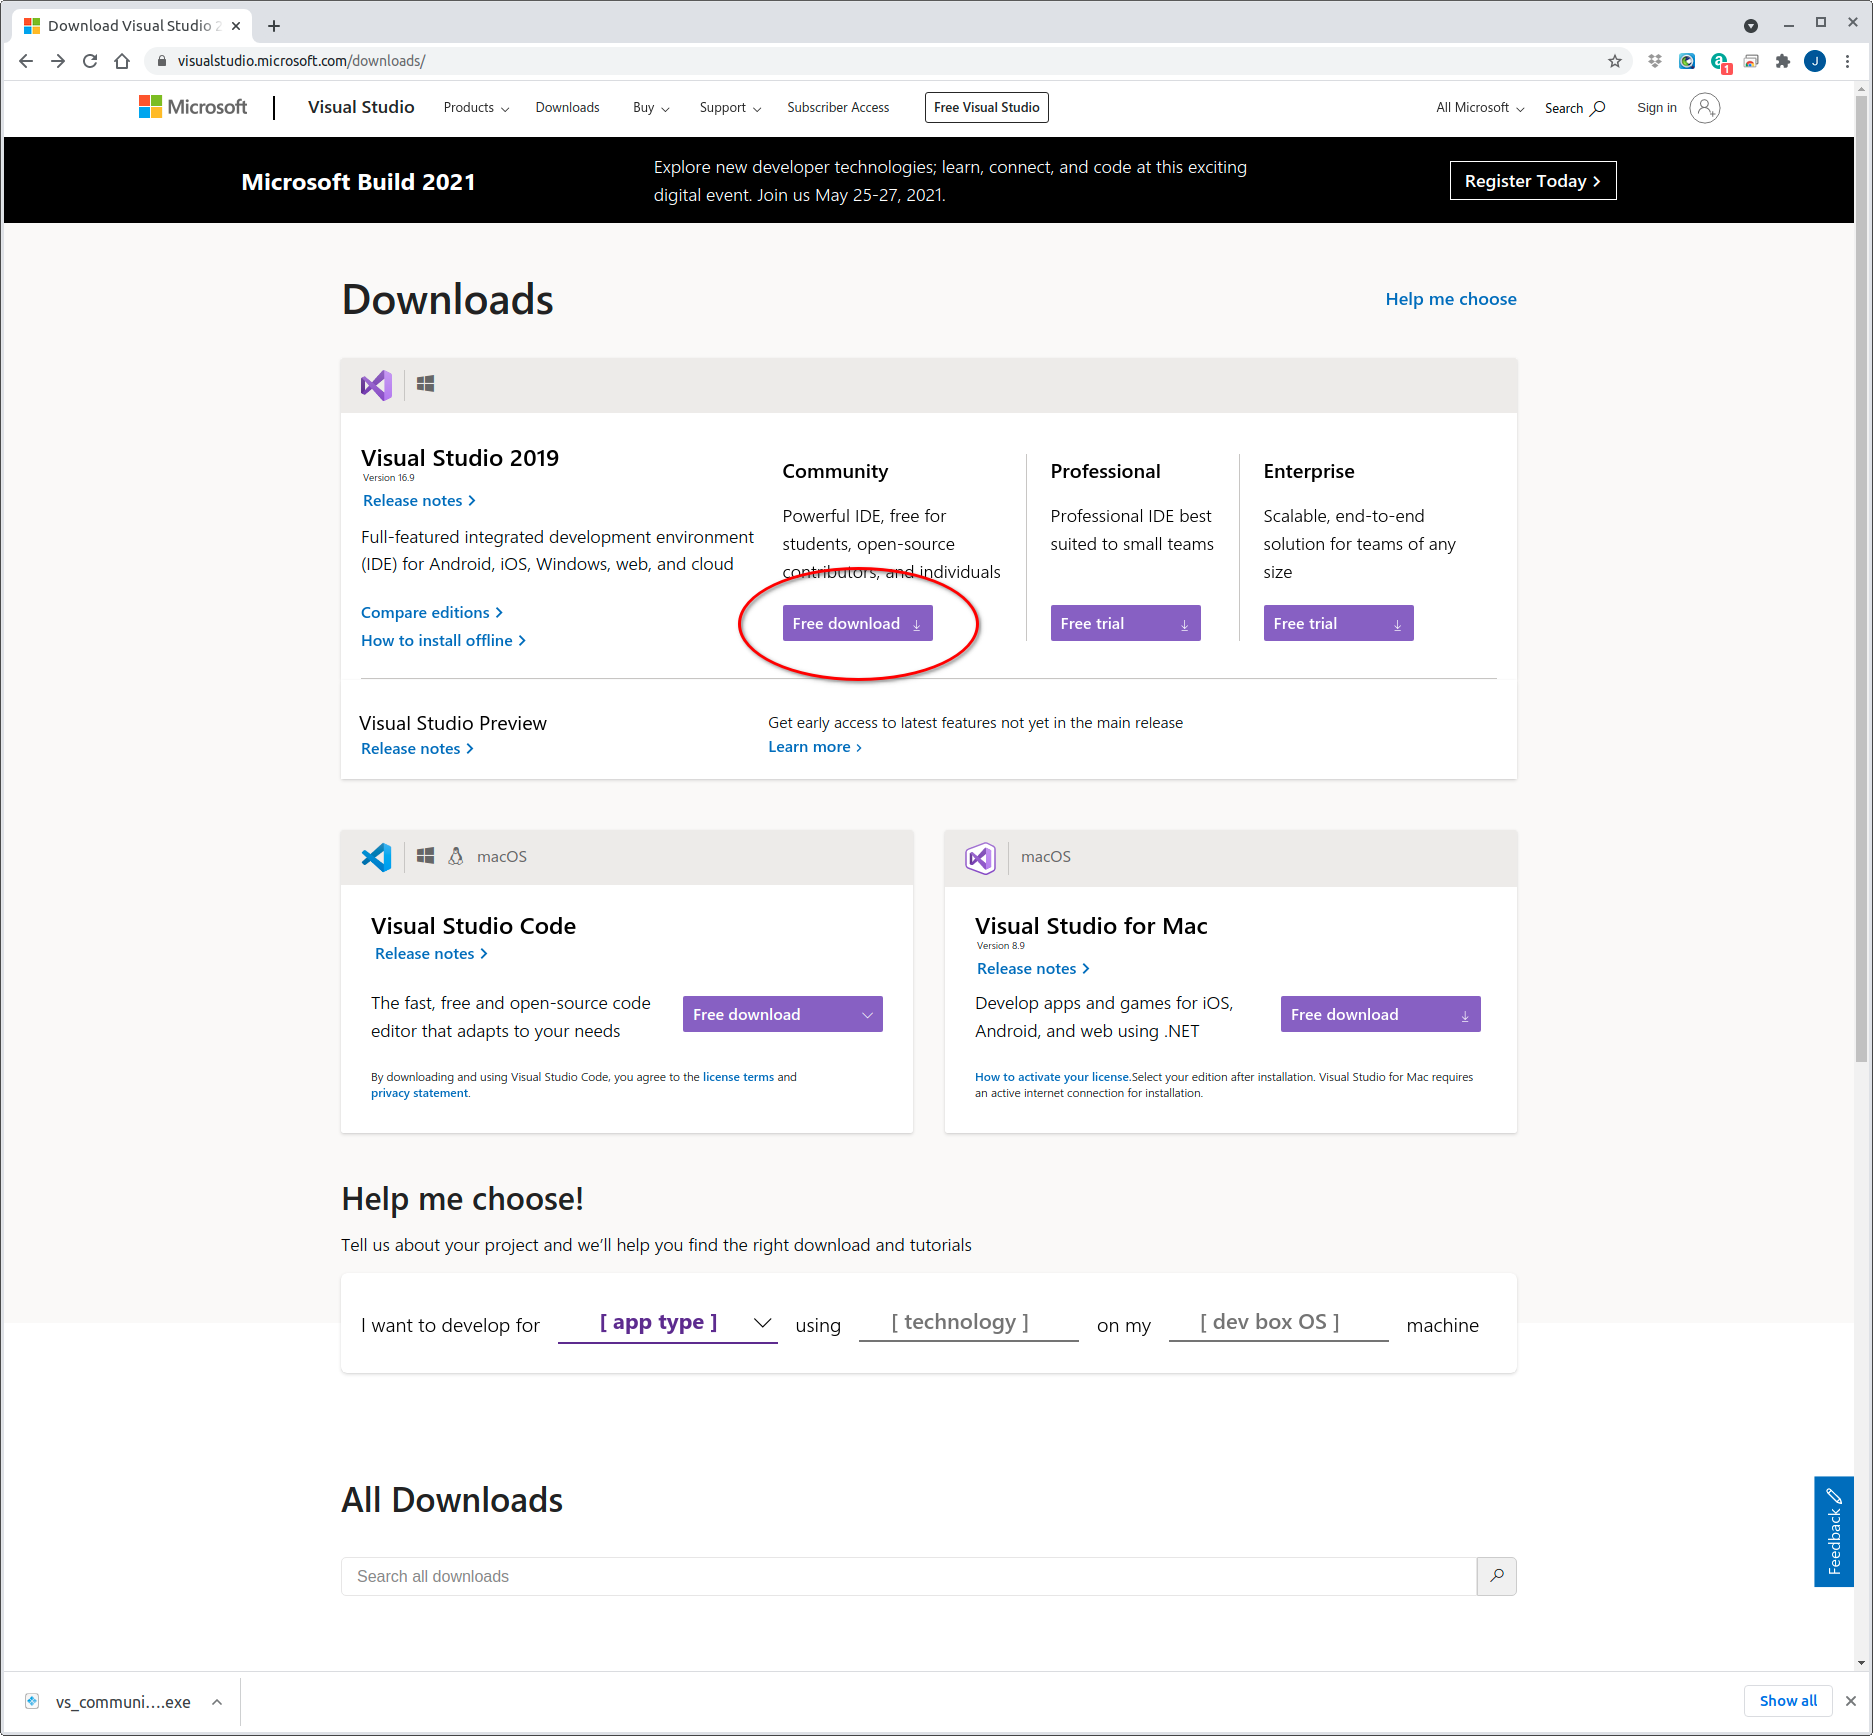
Visual Studio (not to be confused with the IDE Visual Studio Code) is required for installing the C++ dependencies on which welleng runs and which provide the performance of the collision engine. Navigate to Visual Studio Downloads and download the free Community version.
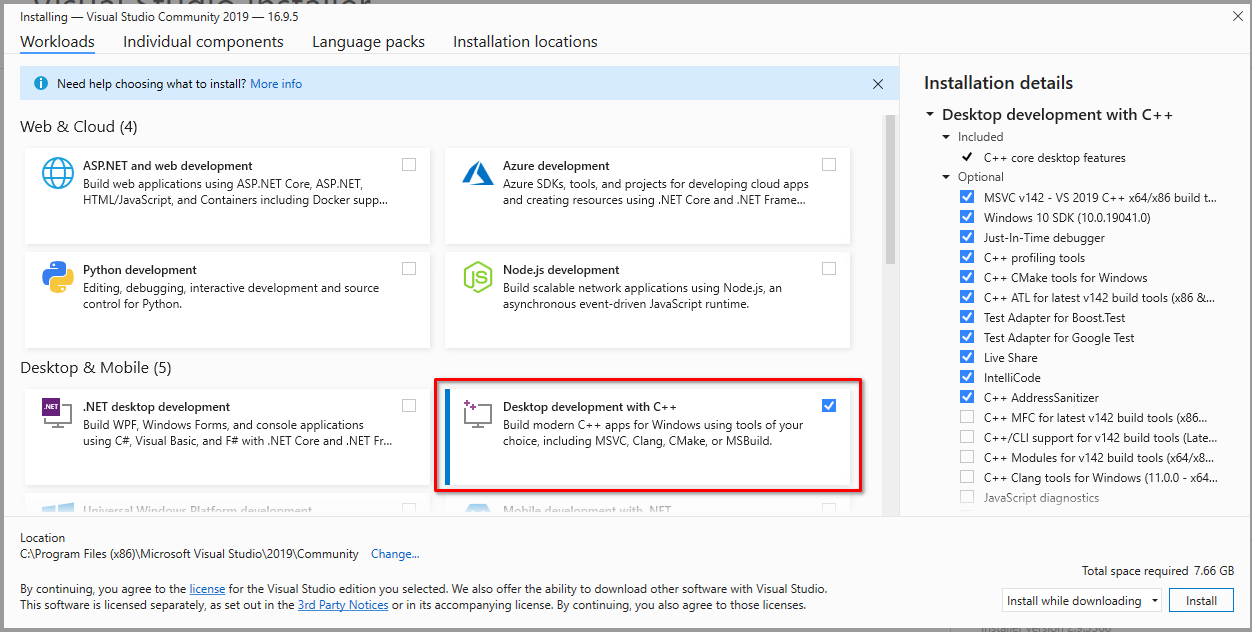
Run the installer that you’ve just downloaded and you’ll get to the screen below. Here we need to manually select the the Desktop development with C++ workload.
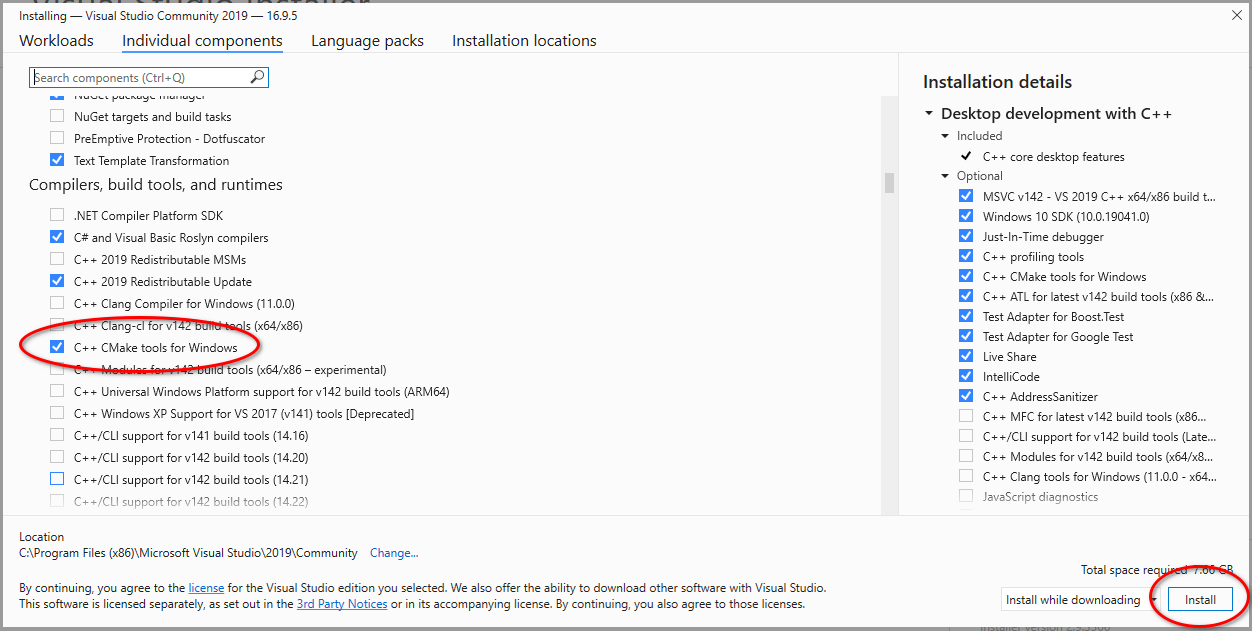
Now go to the the Individual components tab and scroll down to check that C++ CMake tools for Windows is selected and then click Install
You’ll probably need to reboot your system after this install.
Install Visual Studio Code
This step is not strictly necessary, but I’ve included it here since I reference Visual Studio Code in the Git install below, but that option is only available if Visual Studio Code has already been installed. However, feel free to install whatever IDE you prefer.
Otherwise, navigate to Visual Studio Code Downloads and select and download the appropriate Windows version. Run the downloaded file to install the IDE (I recommend selecting the PATH option and after the install rebooting your computer).
Install Git
We’re going to clone a GitHub repo later in this install and the smoothest way to do this is with Git (I’m also a fan of the git workflow and want to encourage people to get experience with git). Alternatively, you can skip this and download and unzip the repo instead.
Otherwise, head over to Git download and select the Windows installer. Once downloaded, run the installer with default options except for the terminal emulator where we will select Use Windows’ default console window (although I select Visual Studio Code as Git’s default editor - the Next button will be greyed out though if you’ve not already installed Visual Studio Code).
Install Miniconda
The intent of this post is to get you up and running with welleng on a Windows OS as painlessly as possible. Since we currently need Python 3.7 for welleng we need the capability to create a Python environment where we can dictate the Python flavor and Miniconda is probably the simplest and leanest way to achieve this. If you want the full Jupyter experience then you can install Anaconda instead.
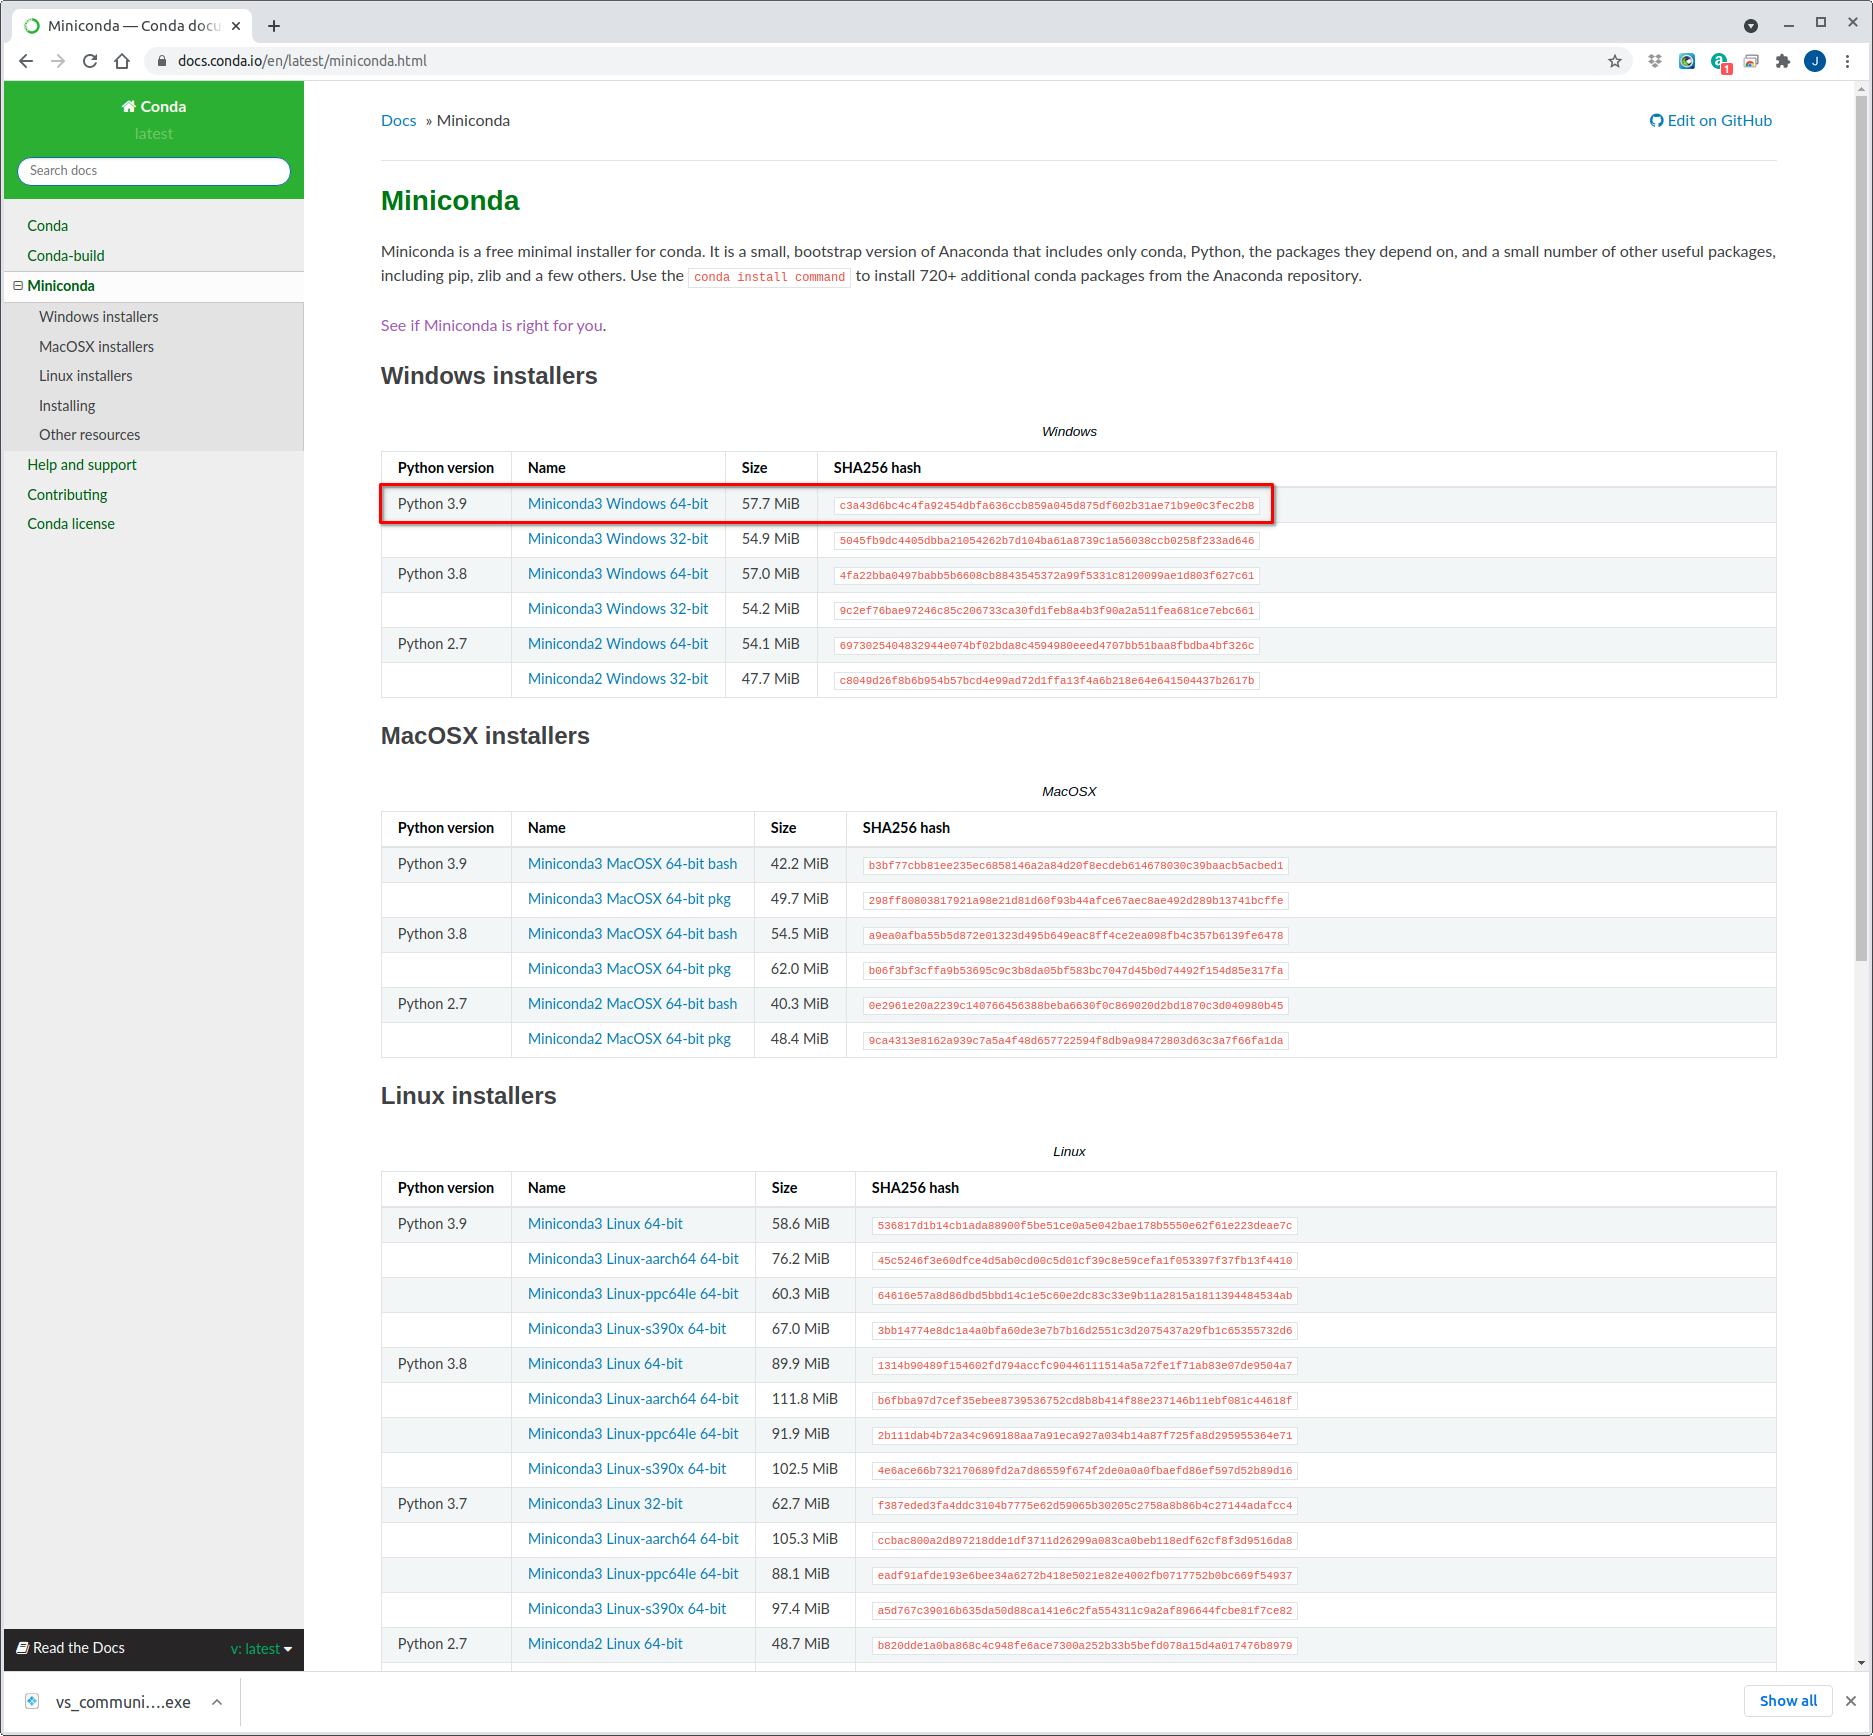
So, head on over to Miniconda downloads and download the latest Windows installer - we want a Python 3.x installer so that we can create a Python 3.7 environment. In this example we’ll download the Python 3.9 64-bit version.
Once the installer is downloaded, go ahead and run it - it’s okay to use the default settings.
Create a conda environment
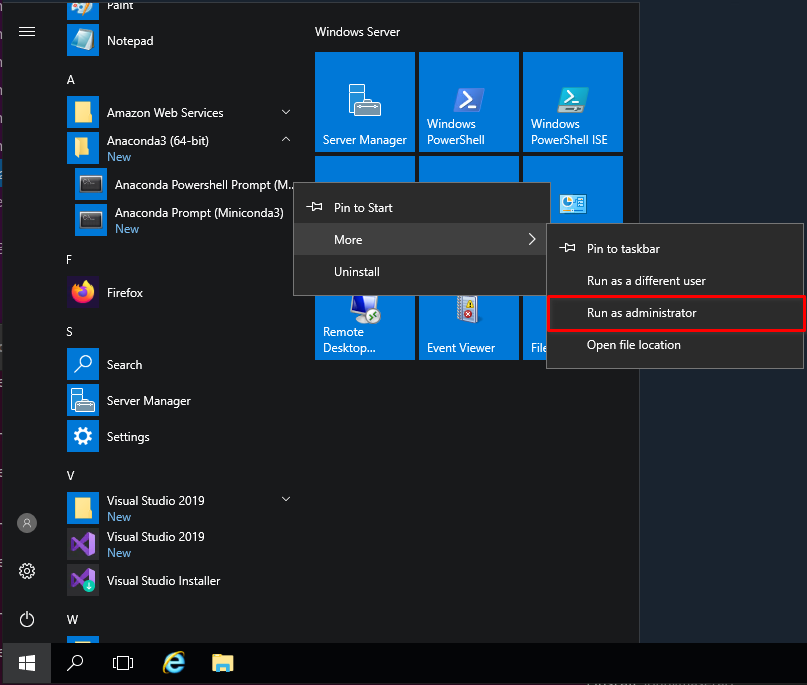
With Miniconda installed we can now create a fresh Python 3.7 environment for welleng. For the installation we need to use an Anaconda Powershell Prompt and Run as administrator. This is done by clicking on the Windows icon and right clicking on Anaconda Powershell Prompt (Miniconda3), which is located in the Anaconda3 (64-bit) folder. Select More and then Run as administrator.
This opens up a Powershell terminal where we can update our base conda install and then create a new env.
> conda update -n base -c defaults conda
> conda create --name welleng python=3.7
For reference, conda maintains a really useful conda cheat sheet if you want to learn more conda commands.
We can now go ahead and activate our new conda env:
> conda activate welleng
In preparation for the next step, we’ll now install a couple of Python libraries into our new env.
> pip install cython, cmake
Clone and install the Pebaz fork of python-fcl
The root cause of the difficulties getting welleng running on Windows are the C++ FCL libraries. Fortunately there’s a fork of the python-fcl repo by Pebaz who has created a PowerShell script for installing the necessary dependencies.
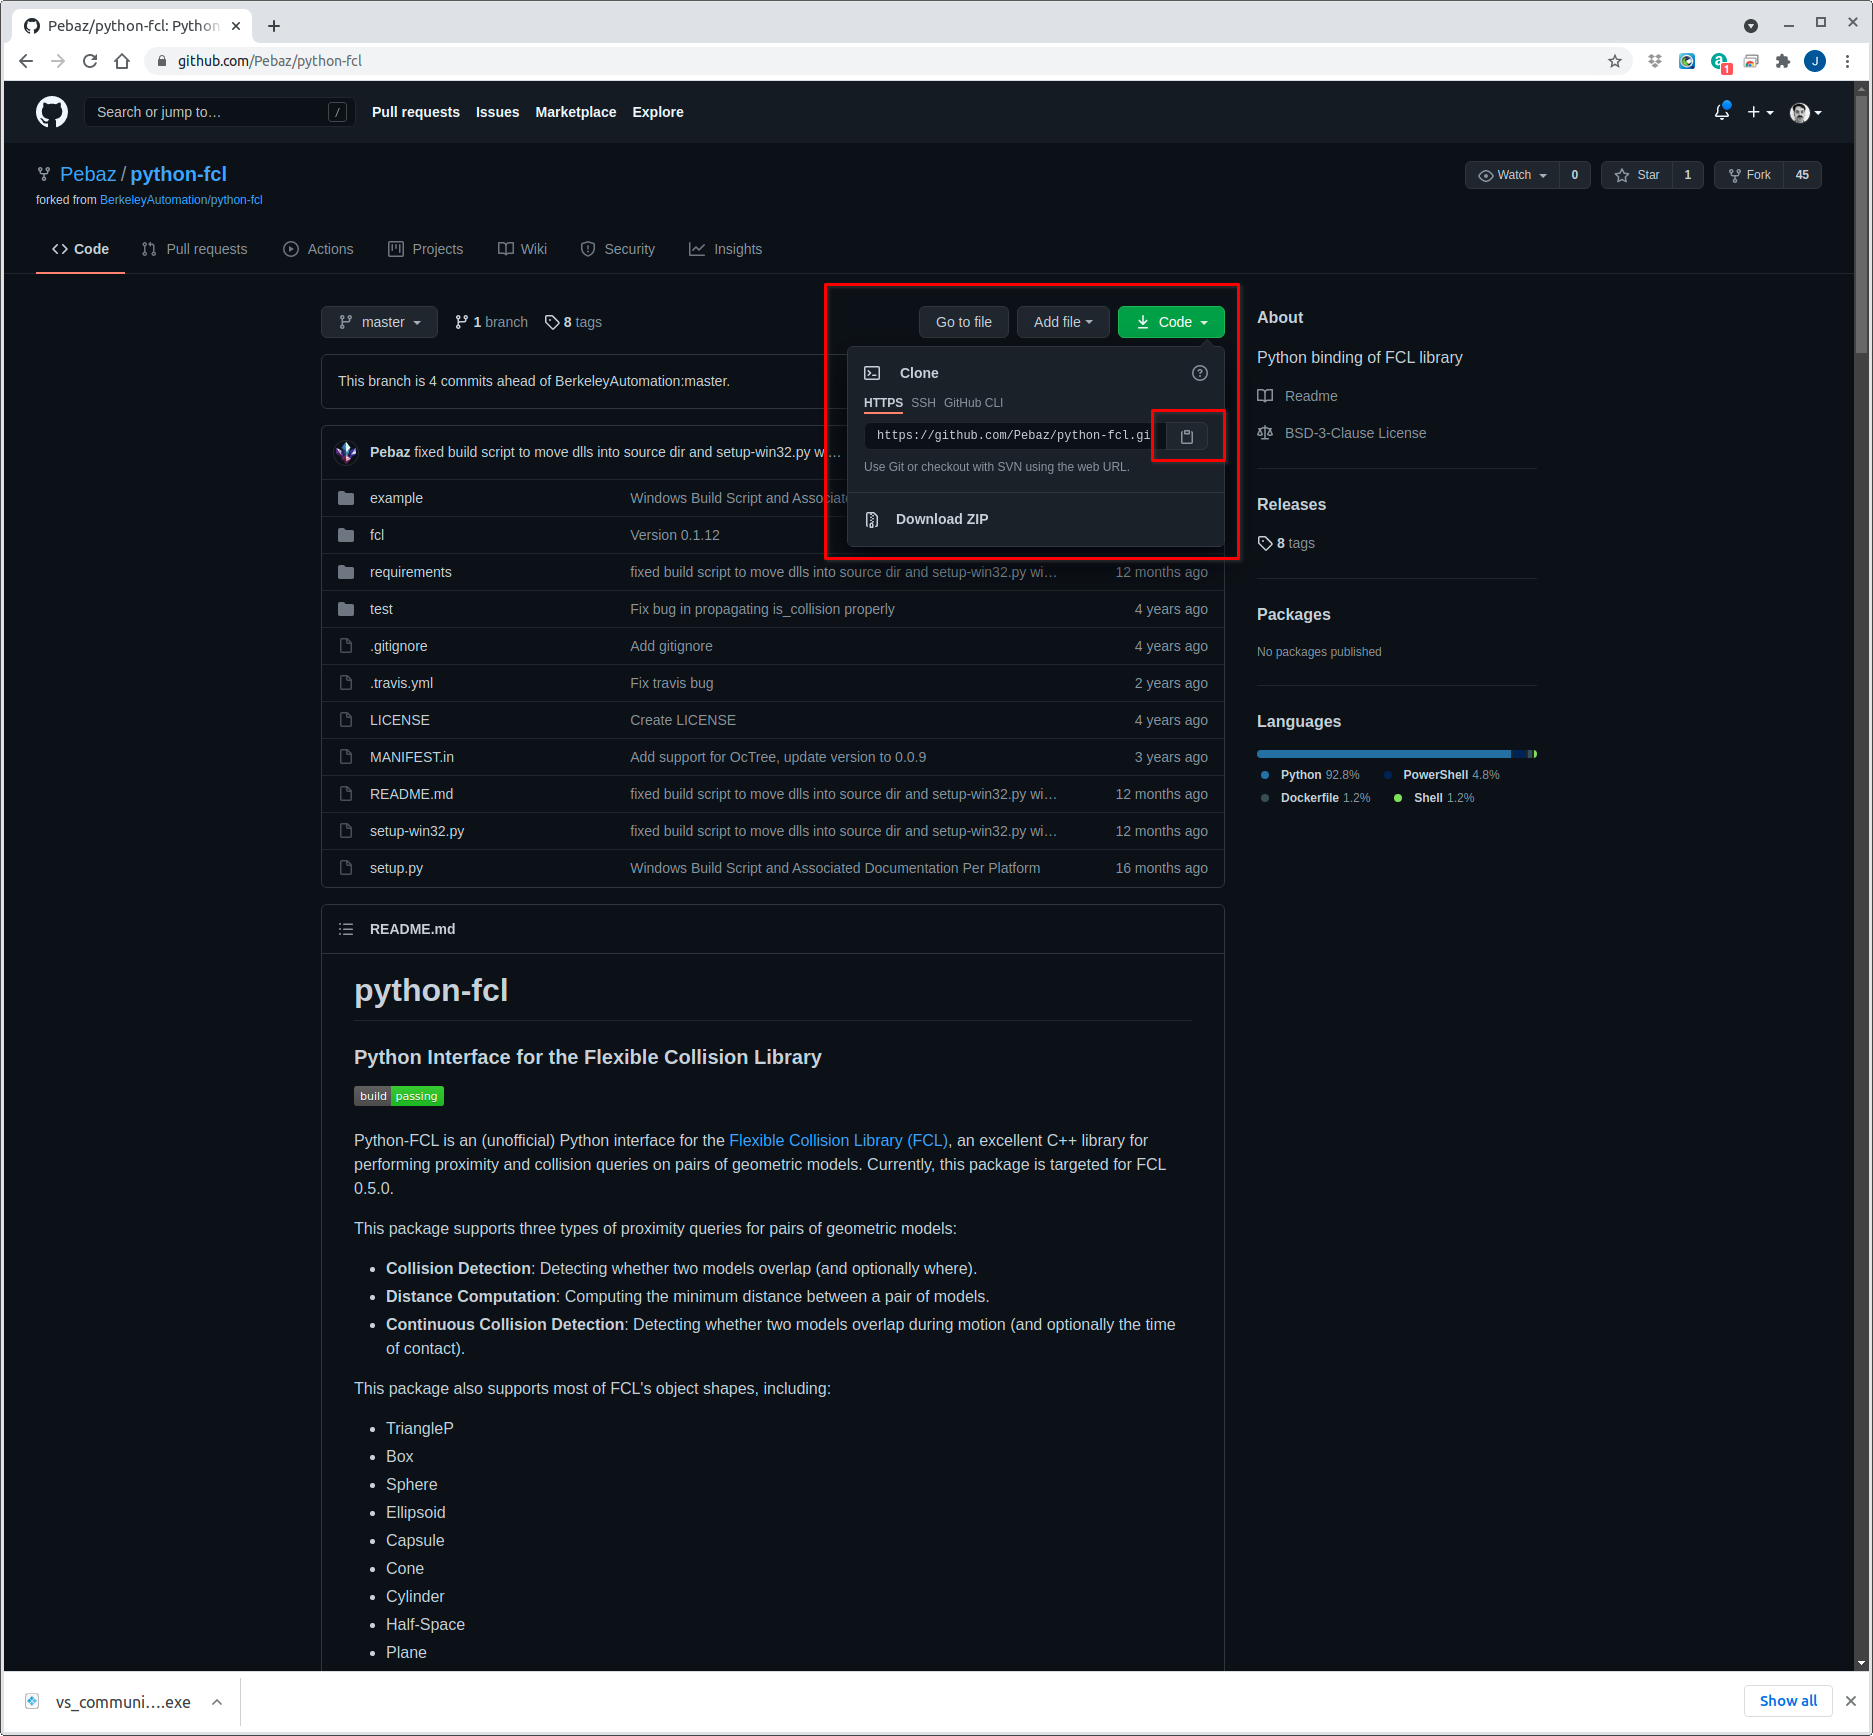
Head over to the Pebaz/python-fcl repo and click the green Code button. Here, copy the Git address to your clipboard.
We’ll now clone this repo locally on our computer. In my WorkSpaces instance I’ll create a folder on the D: drive for my GitHub repos (replace username with your Windows OS username), but typically the Users folder is located on the C: drive.
> d:
> cd .\Users\username\
> mkdir GitHub
> cd GitHub
Now we have a home for our repos, we can clone this python-fcl fork using Git:
> git clone https://github.com/Pebaz/python-fcl.git
This should have created a clone of the repo and placed it in the python-fcl folder in your GitHub folder. Now we can navigate to this folder and execute the PowerShell script.
> cd python-fcl
> requirements/build_win32.ps1
This should have installed all the necessary dependencies for python-fcl (Eigen, LibCCD, FCL and Octomap) and should have installed the python-fcl-win32 library. But, if you type the following command and review the list of installed libraries for the welleng env, python-fcl is missing.
> conda list
Also, if you try and now pip install welleng then the install will break at python-fcl-win32 with a reference error to the version. We can get around this though by installing python-fcl directly from the repo that we’ve cloned.
While still at the Powershell Prompt in the python-fcl folder type the following command:
> pip install .
This will pip install directly from the repo.
Install welleng
All that’s left now is to install welleng.
While still in the Powershell Prompt (it’s not necessary to be in the Powershell for this step, but since it’s still open with the welleng env activated so we may as well use it), enter the following command:
> pip install welleng
End
Congratulations, you should now have a fully functioning version of welleng on your Windows OS!
Head over to the examples and see if you can start planning some well trajectories. Remember to set your IDE to use your new conda welleng Python env.
Good luck!